

How To Put Up A Banister

One of my favorite parts of my kitchen renovation is the new stair wall! We tore down the wall separating the stairs and the kitchen and at present have the prettiest view! Plus the whole room feels more open! I idea I'd share how to install stair railing in case this is a project yous are considering tackling.
Grab upwardly on all the Kitchen I Room Challenge Posts!
Floor Plan / Interior Window / Mood Boards / Stairs Plan / Demo & Alluvion / Drywall / Rainbow Wallpaper / Cabinets, Floors, & Ceiling / DIY Fireplace / Chiffonier Doors / Kitchen Reveal / Stair Railing DIY
how to install stair railing

note, all room sources can be found here.
The outset thing I should say about putting in a new stair railing and balusters is information technology is NOT a beginner DIY. It'southward definitely more of an advanced projection. This took hours and hours longer than we idea it would. Sometimes the new stair railing stumped us and we (my husband and I) weren't sure how to keep. But we preserved I'm and then proud of the final stairs!
As well, you'll want to check your city'southward local code for stairs. To find this, google your city and state with "building lawmaking stair railing." They have exact numbers that different components of the stairs need to be. Stairs tin exist a major condom hazard so y'all don't want to get something incorrect that could harm someone.
So with those warnings, here's the tutorial for how to install stair railing-
SUPPLIES
- 9 Balusters in 36″ height
- 9 Balusters in 41″ height
- Newel Post in White Oak
- Attachment Kit for Newel Postal service
- Hand Runway in White Oak 10′
- Brass Handrail Bracket
- Track Commodities to install Handrail into Newel Post
- Spade Bit 7/8″
- Drill
- 10 Stair Brackets
- Woods Glue
- White Paint (I used Ultra Pure White)

This project costs about $800 in product.
Note, you lot need to buy two-three heights of stair balusters. I didn't realize this at first, but if you think almost it- on each stair you'll accept a short baluster and a alpine i since the railing is going up with the stairs.
Below are links to the items from LJ Smith's website. Above is where to store from retail locations.
balusters / newel post / hand rail / stair bracket
BEFORE

My rainbow stairs are i of my favorite parts of my business firm! Sadly, they were closed on both sides. I've always wondered if the right side had one time been opened to the kitchen.

To get the stairs to the bespeak where they'd be fix to add the new railing, all of the studs in the wall (besides one) were removed. The old railing was even so up and was secured into a stud. On the day we begun this project, the final stud and handrail were removed.

footstep 1
Get-go by figuring out the stairs angle. It is now the time that you lot retrieve all of your 8th class geometry because this requires The Pythagorean Theorem. This angle is very important because it'south what you cut the bottom of the railing on and base everything else on.
If you don't think The Pythagorean theorem, you tin can use this website to plug in numbers and quickly go the bending.
Mensurate the length of the step tread- go from the dorsum of the step to the front of the step. That number needs to be added to line a. Next, measure out the ascent of the back of the stairs- how long the back of the stairs is from one step to the adjacent one. Plug that number into line b. Press calculate to get the stairs angle.

Annotation, the angle should ideally be between 34 and 36 degrees. The very steepest it should be is 37.78 degrees every bit immune by lawmaking in many areas. My city actually doesn't specify this number, but many might.
Every bit you can run across, my stairs are just below 37 degrees. Our old steps are steep, but information technology'll work.
Cut the railing to that angle.

step two
Adjacent, effigy out the height of the handrail. In general, handrails on stairs should exist between 30-38″ high.
We held upwards our railing and saw where information technology hit that worked for the newel post at the bottom, would work for the peak of the stairs, and felt comfy. Nosotros ended upward going with a 36″ handrail meridian.

Once the handrail height is adamant, figure out the newel mail service top.
To practice this, concord the newel mail service in identify and the handrail up to it. marking the top of where the handrail hits the newel mail service and subtract the handrail top (mine is 36″).

Mark the newel post to the correct height and cutting it to length.

step iii
And now, mountain the superlative bracket where the handrail will hit the wall at the right handrail height. Nosotros had to cut off some of the trim on the stair to get the handrail to fit flush to the wall.

Side by side, mount the newel postal service at the lesser of the stairs or on the landing. Make sure there'south something very sturdy to secure it to. If the newel mail service is loose, the handrail and balusters will all be wobbly at the end. We used an Attachment Kit to connect the newel mail to the bottom stair.

Later on the newel post is screwed in, employ terminate nails or woods mucilage to adhere the wood trim from the attachment kit to nicely end off the bottom of the newel mail service.

One time the newel post is secure, drill holes in the handrail. We created ii so that the lag bold could connect through the handrail to the newel mail and a bigger one so the curved bushing tin have a snug fit.
A wood plug comes with the lag commodities then that the big hole tin can be filled with woods and forest glue for a nicely finished product.

After the holes are drilled, install in the new handrail to both the newel post and the brass bracket with the lag bolt.

As a bonus step, you tin can add stair brackets to the side of open stairs. This creates a beautiful display. Note, I painted mine white to lucifer with the remainder of the trim in the room.

step 4
After the newel post and railing are in, information technology's time to concentrate on the balustrades. These are the posts that are on each stair that foreclose falls.

Next, figure out baluster spacing. The number of balusters on each stair depend on your local code and the width of the stairs. Mine worked to practise 2 balusters per stair. We held up the balusters in different places until we were happy with the spacing.

Then, nosotros marked that spacing on each step. This is how far from the riser each baluster will be drilled in.

After that, we used a laser level to observe center on the hand rail. Mark on the handrail where the laser hits- this is where the balusters will be drilled into the hand rail. Also, marker on the stairs where the laser hits. This is how far in from the edge of the stair where the balusters will get in.

Drill holes into the treads on the marked spots.

Tip, use a sharpie to mark how deep to drill the hole. We used a ruby Sharpie marking to draw a line three/4″ in on the drill bit. This is how much infinite the pins on the bottom of the balusters need.

Repeat for all the stair treads.
step v

Finally, test fit a baluster and mark how deep the pigsty volition exist on the hand rail. Note the hole depth shouldn't be more than than 1 i/2″ or the baluster needs to exist trimmed. If the baluster is too long, marker where it needs to be trimmed down to.

We also found it helpful to mark the angle the hole will demand to be drilled in.

Trim the balusters to the correct top. On the lesser of each baluster, nosotros marked which step information technology went on. This make information technology so that each baluster was custom cutting depending on how it hit the handrail.

Use the spade drill flake to create holes in the mitt track in the spots that were marked with a pencil.

Lastly, put the balusters into their bottom tread spot. And then lift upwards the handrail and get each baluster into the hole in the flooring and in the banister.
This can exist a little catchy every bit some holes might need to be made bigger and some balusters might need trimming. But even if this step is difficult, it means that it is finally washed! To finish up, apply wood gum to secure the balusters in the holes in the treads and in the handrail.
Note, our lawmaking states that a spear of 6″ can't fit through any area on the stairs. We tested it and nowhere on the stairs can a vi″ head fit through the new rail! This size will also vary from urban center to urban center.
after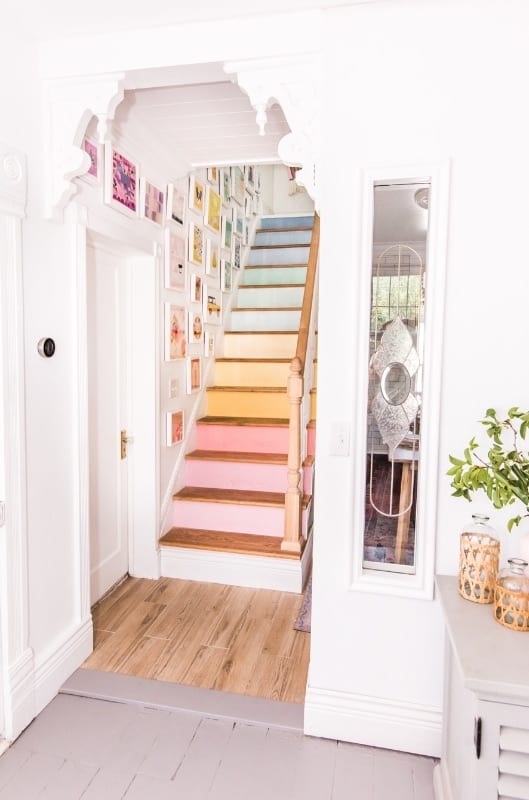
And yay! The stairs are open up and I LOVE the new stair balusters and handrail and newel post! They piece of work perfectly with new floors.
What do you recall? I'chiliad then happy we opened upwardly the stairs! It gave us 7″ more than of extra floor space! Plus, isn't really pretty?!

Anyway, I hope yous similar this project! We did information technology over 3 days and I'm just so happy with how they turned out.
 This post contains some chapter links for your convenience. Click here to read my total disclosure policy. Thank you to LJ Smith Stair Systems for sending product for my stairs!
If yous love it, pin it!

Source: https://athomewithashley.com/how-to-install-stair-railing/
0 Response to "How To Put Up A Banister"
Post a Comment